
Guides & Materials
Kitchen Island Sizing, Seating, and Storage: What Actually Works in a Kootenay Kitchen
November 12, 2026 · Steinegg Cabinets, Nelson BC
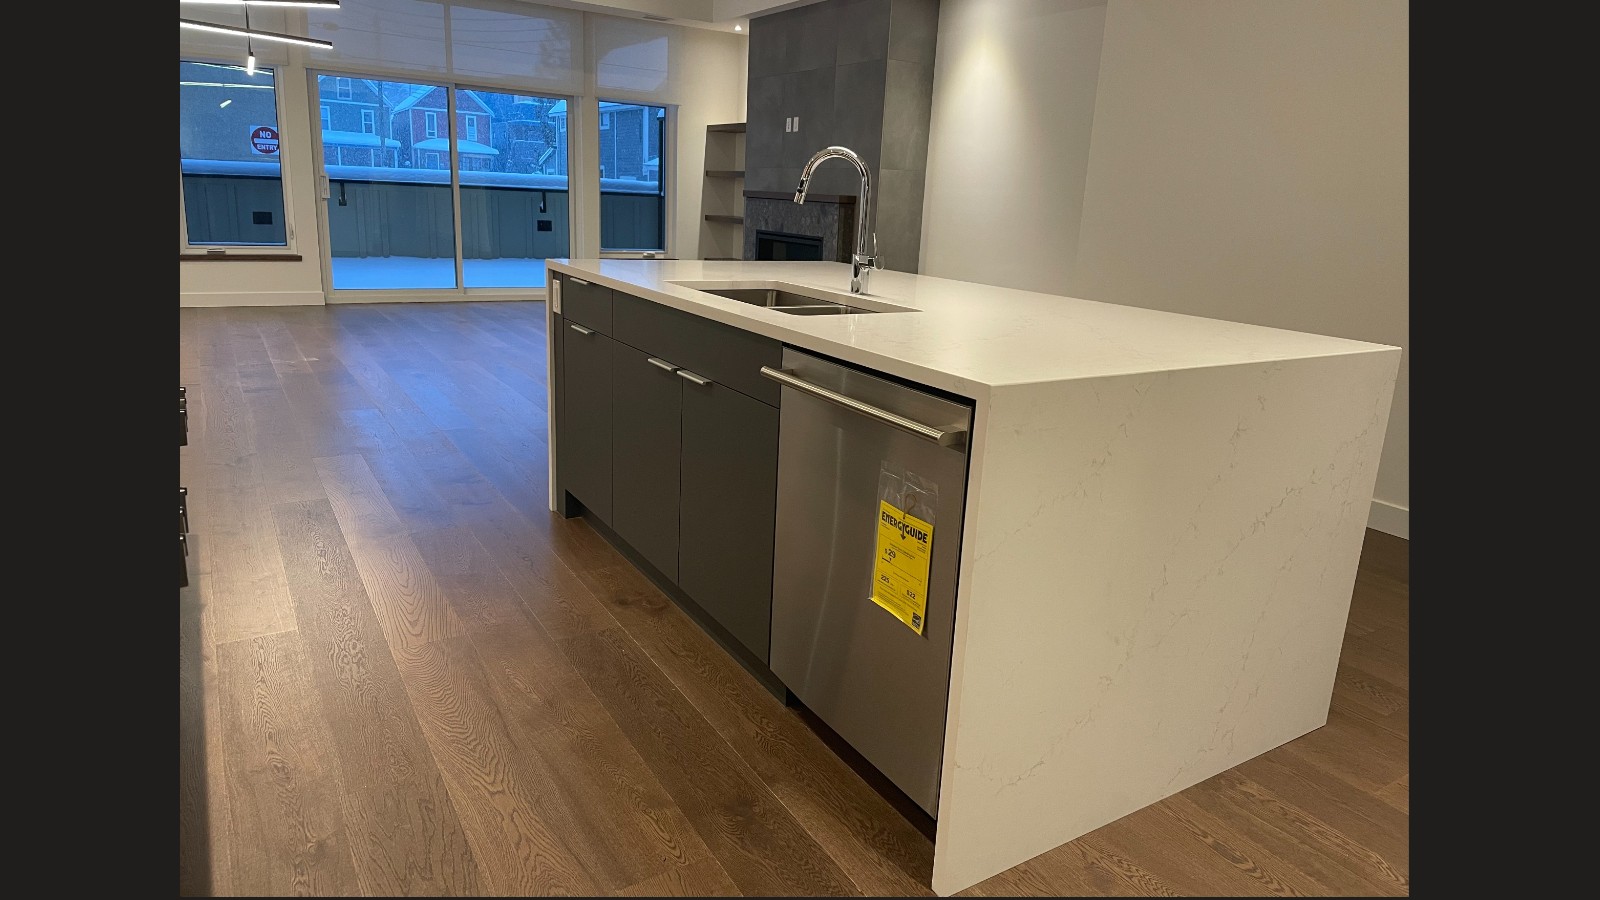
The question we get most often isn't "should I have an island" — almost everyone wants one. It's "how big can I make it without ruining the room." That's the right question. An island that's too tight makes the whole kitchen feel smaller than it was before you added it. An island that's too big turns a 12x14 kitchen into an obstacle course. Here's how we actually size them, and where the trend photos and the real-world numbers disagree.
Start with clearance, not the island
Every island conversation should start with the walking space around it, not the island itself. Pick the island size last.
The rule of thumb we use in our shop: 42 inches minimum on any side someone walks through regularly, and 36 inches is the absolute floor if you're tight on square footage and that side isn't a main thoroughfare. If you've got a dishwasher, oven, or fridge door that swings open into that aisle, push it to 44–48 inches — you want room to stand at the open appliance with someone still able to walk past.
On the seating side, give it more: at least 36 inches from the counter edge to whatever's behind the stools (a wall, a banquette, another counter), and more if people will be getting up and down while someone's cooking. That clearance is measured from the counter overhang, not the cabinet face — easy thing to miss when you're eyeballing it with tape on the floor.
If your kitchen can't give you 42 inches on the walking sides and 36 on the seating side without the island feeling wedged in, you don't need a smaller island — you may not need an island at all. A peninsula or an extended run of counter does the same job with less wasted clearance. We'll tell you that in the first design meeting if that's what the room is telling us, because selling you an island you'll resent isn't worth the sale.
Sizing the island itself
Once the clearances pencil out, the island length is whatever's left. As a floor: 4 feet long by 2 feet deep is the minimum that functions as a real work surface rather than a shelf you bump into. A single-person-prep island in a smaller cottage or condo-style kitchen often lands right there.
For a family kitchen with seating, 6 to 8 feet is the common range, and depth climbs to 36–42 inches once you're adding an overhang for stools on one side. A good gut check: the island shouldn't run longer than about two-thirds the length of your main counter run. Past that, the room starts to feel like it's built around the island instead of the other way around.
Seating: budget real width per person
Give each stool 24 inches of width — not 18, not "they'll squeeze in." Two people elbow-to-elbow at 18 inches each is miserable after the first coffee. For overhang depth, 12 inches is the minimum for knee clearance at counter height; bump it to 15 inches for bar-height seating, since stools sit higher and people need more room to get their legs under comfortably.
One thing that trips people up: a waterfall edge (where the countertop wraps down the end of the island to the floor) looks fantastic in photos, but it eats into usable overhang if it's on the seating end. We'll flag that in the drawing stage — it's a styling call, not a mistake, but you should make it on purpose.
What goes in it: storage and electrical
An island is prime real estate, and the worst thing you can do with it is fill it with one giant open cavity. In our shop, we almost always split island storage into zones: drawers facing the cook (where pots, utensils, and prep tools actually live), and a different storage style facing the room — open shelving, a wine rack, or a cabinet with doors — if the island backs onto a living or dining space. We built exactly that split on a recent install: white oak uppers, open shelving on the island's back side so it reads as furniture from the living room, not just a kitchen box. If open shelving on an island end is something you're considering, we wrote up what it's actually like to live with open shelving in more detail — it's not for everyone, and we say so.
Electrical matters more than people expect. If your island has any counter space meant for actual use — mixer, coffee station, charging a laptop — it needs outlets, and BC electrical code has specific requirements for countertop receptacles that your electrician needs to sign off on, not us. Get the electrician into the design conversation before the cabinet boxes are built, not after. Moving a drain or an outlet after the island is built is a bigger job than it should be. Plan ahead to save time and cost later.
Material and budget reality
Waterfall quartz or a big slab of granite on an island face is a statement, and it's not cheap — you're paying for a bigger single slab and more fabrication, not just more material by the square foot. If budget's tight, a matching panel end with a standard countertop overhang gets you most of the visual weight for a fraction of the cost. We go through the real tradeoffs between countertop materials in our laminate vs. quartz vs. granite guide
A Kootenay-specific note on timing
Islands are almost always a custom-sized piece, not a stock cabinet run, so they go through the same production queue as the rest of your kitchen. If you're renovating around ski season or trying to get a new build move-in ready before winter trucking gets harder on the passes, build the island decision into your early design meetings rather than a change order halfway through. We've got more on planning timelines in our lead time guide.
FAQ
How big should my kitchen island be for a family of four? If you want seating for the whole family, plan on 7–8 feet long by 36–42 inches deep, assuming your room can give you 42 inches of clearance on the walking side and 36 inches on the seating side. If the room can't give you that clearance, a smaller island or a peninsula will serve the family better than a cramped big one.
Can I put a sink or cooktop in my island? Yes, but it changes the plumbing and ventilation plan significantly — a sink needs a drain run under the floor or through the basement, and a cooktop needs a downdraft vent or a hood hung from the ceiling, which affects your layout above the island too. Decide this early; it's one of the most expensive things to change mid-project.
Do I need an electrical outlet in my island? If there's usable counter space on it, yes — BC electrical code requires it for countertop receptacles, and your electrician will confirm the exact placement. Loop them into the design conversation before the boxes are built.
What's the minimum space I need around an island? 42 inches on any side people regularly walk through, 36 inches minimum if that side isn't high-traffic, and at least 36 inches behind any seating. Measure from the countertop overhang, not the cabinet face.
Is a waterfall countertop worth it on an island? It's a style choice, not a functional upgrade — it costs more in slab and fabrication and can reduce usable overhang if it lands on your seating end. If budget's a factor, a painted panel end gets you a similar look for less.
Thinking through an island for your own kitchen? Get in touch and we'll walk the space with you, or browse our services and past work to see how we've handled island storage and seating in other Kootenay homes.
Planning a project in the Kootenays?
Talk it through with a local shop — free consultation, honest advice, built-to-fit cabinetry from Nelson, BC.