
Guides & Materials
Mudroom Storage That Survives Kootenay Ski Season
September 24, 2026 · Steinegg Cabinets, Nelson BC
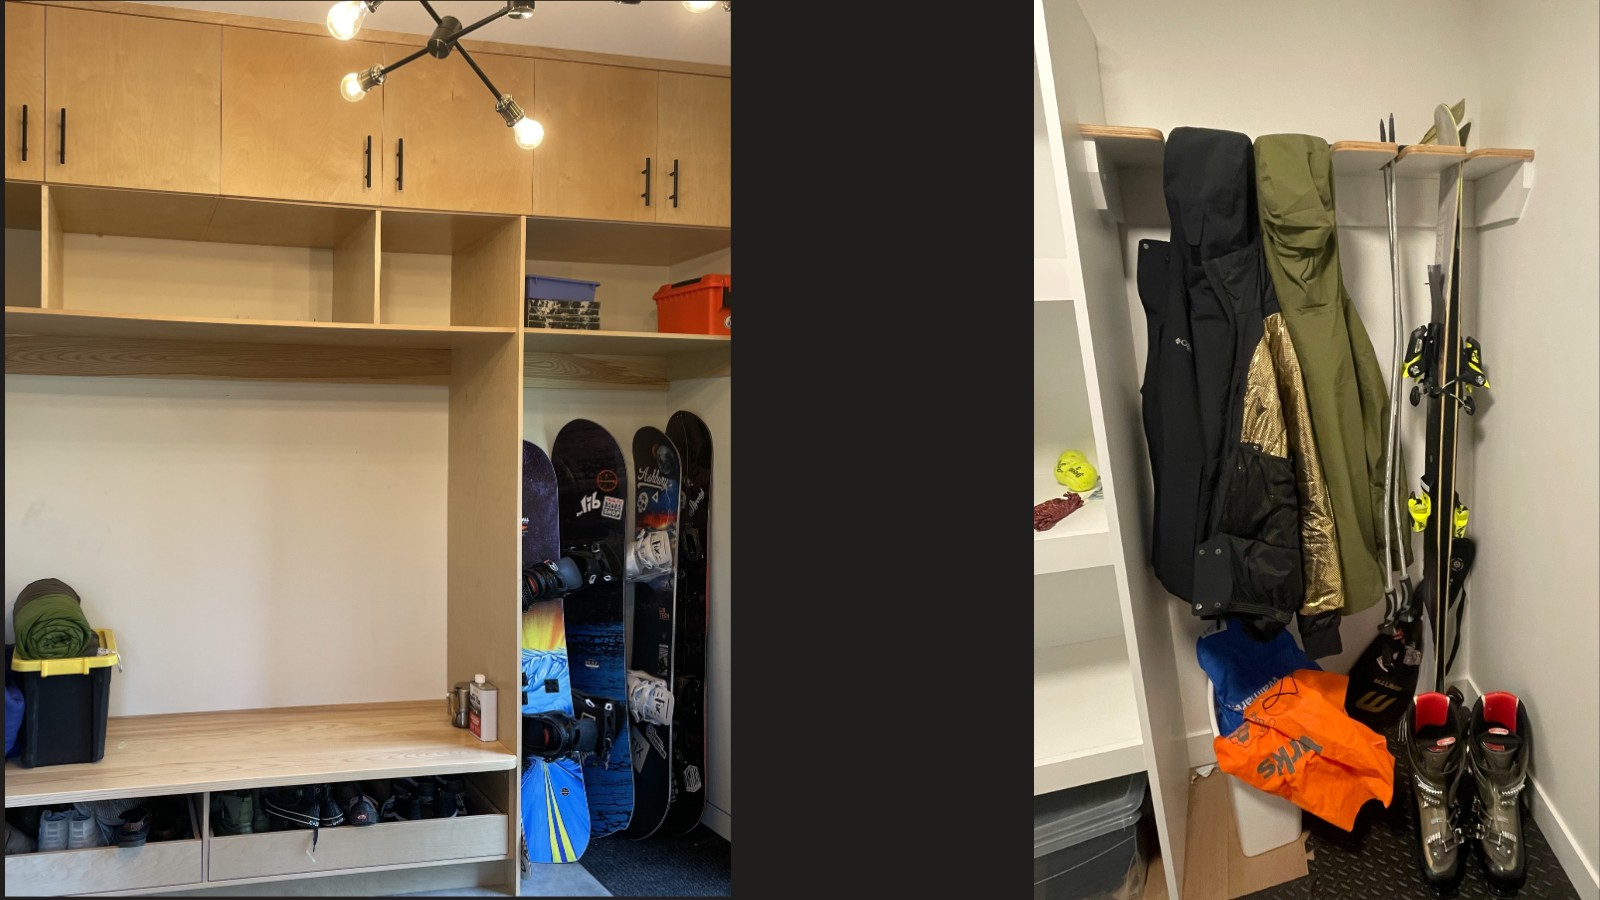
Building a Mudroom That Survives a West Kootenay Winter
Every fall we get the same phone calls. Somebody just watched the leaves turn on the hills above Nelson and realized their entryway is still set up for flip-flops and garden shoes, not four kids' worth of ski boots, wet snow pants, and a dog that's about to track slush across the kitchen floor for the next five months. If that's you right now, you're not behind — but you're getting close. A built mudroom takes us two to four weeks in the shop once a design is locked, so if you want it in before the first real dump, this is roughly the window to get moving.
Here's what we've learned building these for houses from Blewett to Balfour, and what actually holds up once ski season hits.
Start with the bench, not the cubbies
Everybody comes in wanting to talk about sections and hooks first, but the bench is the piece that does the most work. You need something to sit on to pull off a ski boot, and you need it low enough that a kid can use it without help. We build ours around 17–18 inches high, deep enough (14–16") to actually sit on rather than perch on, and we almost always put storage underneath — either open cubbies for boot trays or a drawer bank if the household wants things closed up.
The mistake we see in a lot of pre-built or big-box mudroom furniture is a bench top that's too narrow or an apron that's too low, so nobody can actually get a boot off without banging a knee. Sit on the design before you approve it, even if that means sitting on a mockup in our shop.
Materials: this is where mudrooms actually fail
We've written before about melamine vs. birch plywood for cabinet boxes, and mudrooms are the one room in the house where that choice matters most. A mudroom takes a beating a kitchen never does — snowmelt pooling on a bench top, wet gloves left in a cubby overnight, a dog shaking off right next to the lower drawers.
A few things we build into every mudroom regardless of budget:
- No exposed MDF or particleboard edges anywhere water can reach. MDF absorbs water and swells permanently — there's no fixing it once it's happened. If we're using melamine (and often we do, because it's stable and affordable), every cut edge gets banded, and horizontal surfaces near the door get extra attention on the seams.
- Solid wood or engineered hardwood flooring for the bench top itself. It's the one surface that's guaranteed to see standing moisture. Birch plywood with a hard-wearing finish, or a slab of white oak if the budget allows, both do well.
- A boot tray or a sealed bottom, not bare wood, under the boot cubbies. We'll build the cubby out of good material and still recommend a rubber or plastic tray liner, because no finish beats not getting wet in the first place.
- Powder-coated hooks and hardware, not polished chrome. Salt off the highway and moisture in the air will pit cheap plated hardware within a couple of seasons.
None of this needs to be expensive. It needs to be the right material in the right spot — that's a conversation we have with every client before we draw anything.
Drying, not just storing
Storage keeps gear organized. Drying is what actually keeps the room from smelling like a hockey bag by January. A few approaches, roughly in order of cost:
Open, well-spaced cubbies. The cheapest fix is often just airflow — don't jam boots into a tight enclosed compartment with a door. An open-front cubby with a slatted or perforated bottom lets air move.
A boot rack with a gap off the floor. Even a simple angled rack that keeps boots off a flat surface and tilted forward drains and dries faster than boots sitting flat.
Heated boot dryers. If your household lives on skis and boards from November to April, a built-in heated drying system (a few outlets and a low-voltage warming rack tucked into the cubby base) is worth pricing out. We can build cabinetry around off-the-shelf units — we don't manufacture the heating element ourselves, but we'll design the box to fit one cleanly with the venting it needs.
We won't push the heated option on everyone. If you're an occasional weekend skier, a well-ventilated open cubby and a boot tray will do the job for a fraction of the cost. If you've got a family who's out four or five days a week all winter, the drying hardware pays for itself in fewer smelly boots and less mildew.
Ski and board racks: vertical storage that doesn't eat the room
Skis and boards are long and awkward, and most families end up leaning them against a wall where they fall over and scratch the base every time someone walks by. A built rack solves this with minimal floor footprint — usually a slotted or cleated vertical rack mounted to a wall or built into the end of a run of sections, sized for the actual gear (adult skis, kids' skis, and boards all want slightly different slot widths).
If ceiling height allows, we'll sometimes build a rack that lifts skis up and out of the main traffic path entirely, which matters a lot in a smaller entry.
Sizing it for how your family actually leaves the house
Before we draw anything, we ask how many people use this entry, and honestly, what it looks like on a bad day — five kids getting ready for the hill at once is a different design problem than one adult heading out solo. Individual sections with a cubby, hook, and shelf per person work well for families; a simpler bench-and-open-storage layout works better for smaller households who don't need to reserve real estate.
This is also where we talk about what else the room needs to do — a lot of West Kootenay entries double as the dog's spot or overflow pantry storage, worth mentioning up front so we're not redesigning the layout halfway through.
What this costs
Ranges, because every mudroom is different: a simple bench-with-cubbies unit, built-in, finished, and installed, typically runs in the low-to-mid four figures. A full wall of individual sections with drawers, a ski rack, and upgraded hardware for a family of five can run into the five figures. The honest driver of cost is length of run and number of individual storage zones, not the materials — moving from melamine to solid wood on a bench top is a smaller swing than most people expect.
If you're weighing a mudroom against other projects this fall, our services page has a rundown of what we build and roughly how we price it, and our Reimagine tool can give you a rough sense of layout before you ever come in for a measure.
Getting it done before snow flies
Realistically, if you want a built mudroom in place before the first real snowfall, plan on getting a design locked by early-to-mid October. From a confirmed design, we're usually looking at two to four weeks in the shop, plus install. Get in touch and we'll tell you straight whether your timeline is realistic or whether it makes more sense to plan for a spring build instead.
FAQ
Is melamine okay for a mudroom, or do I need solid wood? Melamine is fine for most of the cabinet — it's stable and affordable. We just don't want exposed MDF or particleboard edges anywhere water sits, and we prefer solid wood or good plywood for the bench top itself, since that's the surface most likely to see standing moisture.
Do I need a heated boot dryer? Only if you're out on snow most days. Occasional skiers do fine with an open, well-ventilated cubby and a boot tray. Daily users get real value out of a built-in heated rack.
How much floor space does a mudroom actually need? A basic bench-and-cubby setup can fit in as little as 4–5 linear feet. A full wall of sections for a family of five is usually more like 8–10 feet. We can work with narrower spaces by going with hooks and open shelving instead of full sections.
Can you retrofit an existing entry, or does this need to be new construction? Most of our mudroom work is a retrofit — an existing entry, laundry room, or back hall that gets built out. We measure the space as it is and design around what's already there, including plumbing or electrical you don't want to move.
What if I only have room for a bench, no cubbies? That's a completely reasonable starting point. A bench with a couple of drawers underneath and a few wall hooks above handles a lot of households fine — you can always add a wall of sections later if the family or the gear collection grows.
Planning a project in the Kootenays?
Talk it through with a local shop — free consultation, honest advice, built-to-fit cabinetry from Nelson, BC.